Quick Start
This section introduces the Dobot+ ecosystem accessory development process, project resource structure, and related concepts.
The Dobot+ ecosystem plugin development toolkit consists of the following npm packages, with @dobot-plus/cli as the basic tool for developing Dobot+ plugins.
| npm Package | Purpose |
|---|---|
| @dobot-plus/cli | Dobot+ plugin development CLI tool for project init, debug, build |
| @dobot-plus/lua | Lua syntax checker for Dobot+ plugin |
| @dobot-plus/gui | Visual configuration tool for block and script programming |
| @dobot-plus/components | Official component library for Dobot+ plugins |
| @dobot-plus/template | Plugin project template |
Installation
Run the following script to install the developer tools.
npm install -g @dobot-plus/cli
After successful installation, a CLI tool named dpt will be registered in your system.
$ dpt
Usage: dpt [options] [command]

dobot plugin toolkit

Options:
  -v, --version    output the version number
  -h, --help       display help for command

Commands:
  create           create a new plugin
  dev [options]
  lua              run lua scripts
  gui [options]    config the project with web GUI
  build [options]  build plugin for production
  help [command]   display help for command
Create a Plugin
Run the following command to create a new plugin folder:
dpt create
This command requires you to provide:
- Plugin name (must not duplicate any subfolder name in the current path)
- Description (optional, defaults to empty)
- Version number (default: 1-0-0-test, format:
[major]-[minor]-[patch]-[status], separated by-, status in lowercase such astest,stable,rc) - Controller IP address (default:
192.168.5.1, can be changed later for debugging)
After providing the required information, the tool will create a folder with the specified name, containing the necessary source code template and automatically install dependencies.
Upon successful creation, you will see output similar to the following:
 $ dpt create
? Please input plugin name
 my-plugin
? Please input plugin description This is a description
? Please input plugin version 1-0-0

Packages: +345
++++++++++++++++++++++++++++++++++++++++++++++++++++++++++++++++++++++++++++++++++++++++++++++++++++++++++++++++++++++++++++++++++++++++++++++++++++++++++++
Progress: resolved 346, reused 343, downloaded 2, added 345, done

dependencies:
+ antd 5.20.1
+ axios 1.7.3
+ i18next 23.12.3
+ pubsub-js 1.9.4
+ react 18.3.1
+ react-dom 18.3.1
+ react-i18next 15.0.1
+ react-redux 9.1.2
+ redux 5.0.1

devDependencies:
+ @types/node 20.14.15 (22.2.0 is available)
+ @types/pubsub-js 1.8.6
+ @types/react 18.3.3
+ @types/react-dom 18.3.0
+ @types/react-redux 7.1.33
+ @typescript-eslint/eslint-plugin 7.18.0 (8.1.0 is available)
+ @typescript-eslint/parser 7.18.0 (8.1.0 is available)
+ add 2.0.6
+ css-loader 7.1.2
+ eslint 8.57.0 (9.9.0 is available)
+ eslint-plugin-react-hooks 4.6.2
+ eslint-plugin-react-refresh 0.4.9
+ postcss-loader 8.1.1
+ sass 1.77.8
+ sass-loader 16.0.0
+ style-loader 4.0.0
+ ts-loader 9.5.1
+ typescript 5.5.4
+ url-loader 4.1.1
+ webpack 5.93.0

Done in 24.3s
If you encounter issues during installation, enter the newly created plugin folder and manually install the required dependencies:
npm install
⚠️ The installation process will automatically run pnpm steps. Please allow this operation. Some dependency warning messages are normal; check the final log for actual initialization status.
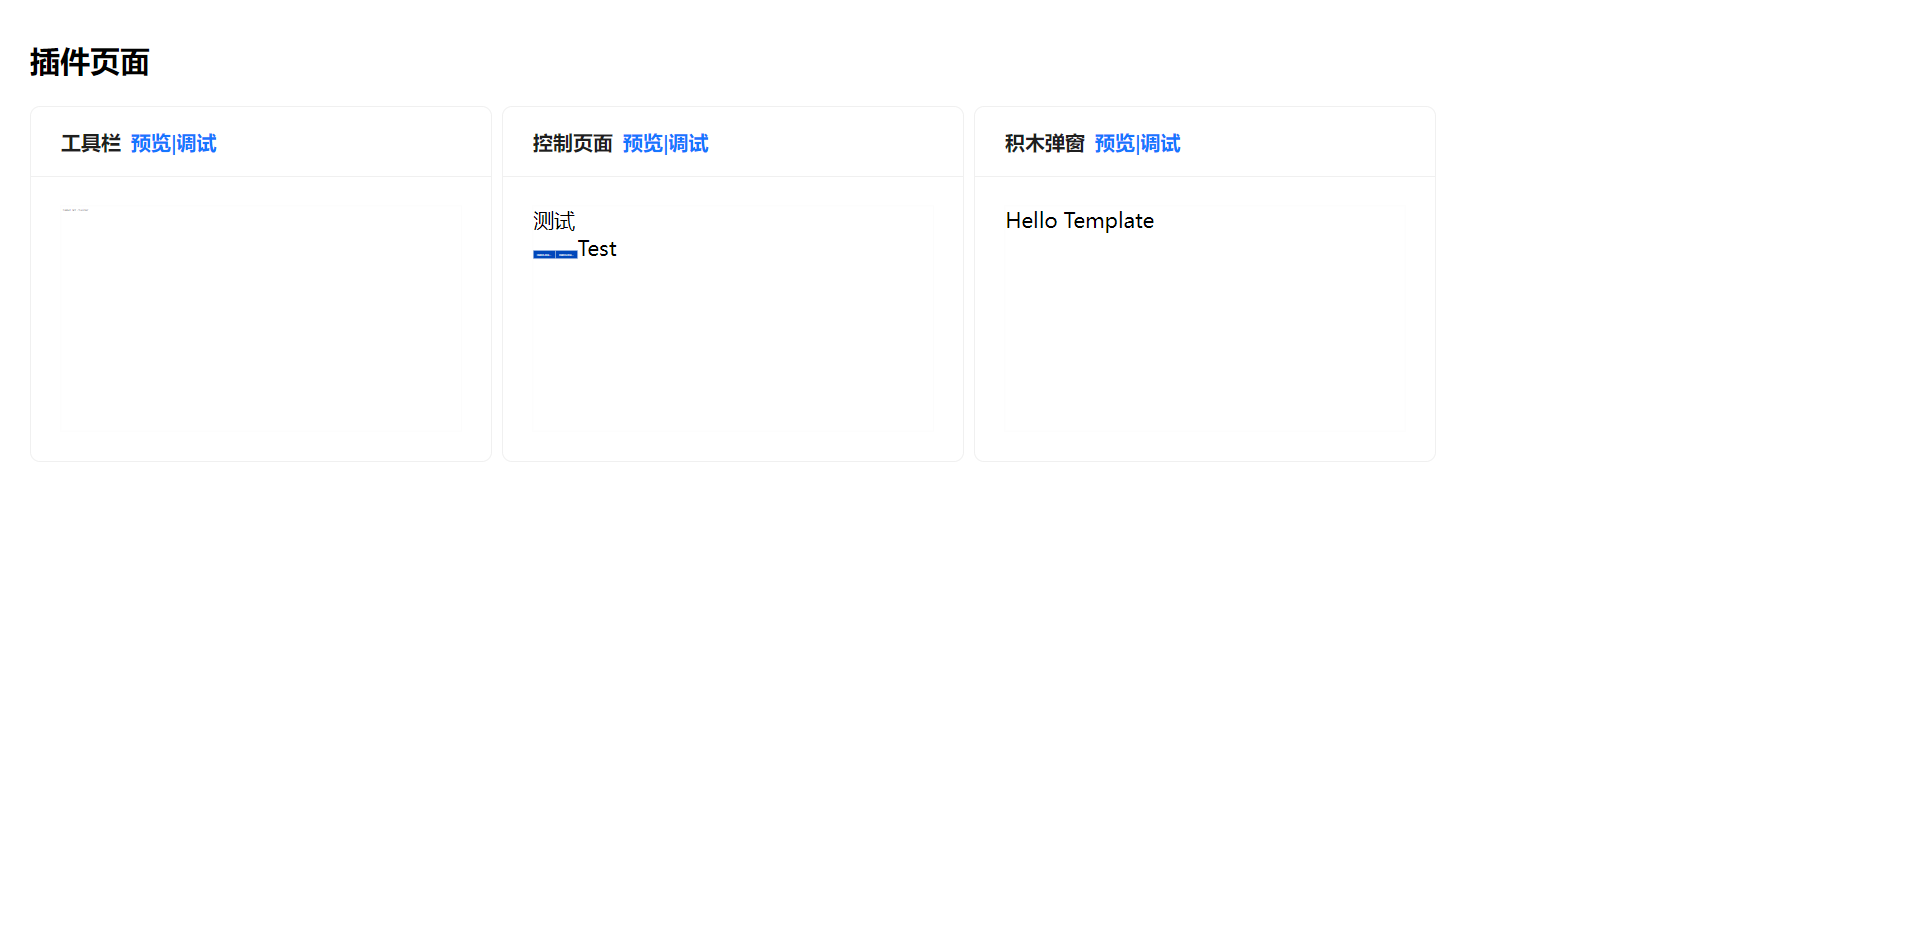
File Structure
Dobot+ ecosystem accessories consist of three modules: plugin installation interface, graphical programming blocks, and script programming commands. All are configured via config.json, supporting internationalization and quick navigation.
my-plugin
├── .dobot # Built-in methods, components, lua scripts, etc.
├── .vscode # VSCode config files
├── Resources # Resource folder
│   ├── document
│   │   └── config.json
│   ├── i18n # Internationalization resources
│   │   ├── client # Translations for blocks, scripts, plugin client display
│   │   │   ├── de.json # German
│   │   │   ├── en.json # English
│   │   │   ├── es.json # Spanish
│   │   │   ├── hk.json # Traditional Chinese
│   │   │   ├── ja.json # Japanese
│   │   │   ├── ko.json # Korean
│   │   │   ├── ru.json # Russian
│   │   │   └── zh.json # Chinese
│   │   └── plugin # UI translations for plugin interface
│   │       ├── de.json
│   │       ├── en.json
│   │       ├── es.json
│   │       ├── hk.json
│   │       ├── ja.json
│   │       ├── ko.json
│   │       ├── ru.json
│   │       └── zh.json
│   └── images
│       └── pallet.svg
├── configs # Config files
│   ├── Blocks.json  # Block programming config
│   ├── Main.json    # Plugin info config
│   ├── Scripts.json # Script programming config
│   └── Toolbar.json # Toolbar config
├── dpt.json # Debug controller config
├── lua # Controller lua scripts
│   ├── daemon.lua  # Main process
│   ├── httpAPI.lua # HTTP request handler
│   ├── userAPI.lua # Script/block programming API
│   ├── PluginName.lua # Plugin business module implementing code reuse for script programming and HTTP communication
│   └── PluginName # Lua utility functions
│       ├── modbus.lua # 485 channel utility
│       ├── mqtt.lua # MQTT connection utility
│       └── variables.lua # Variables module
├── package.json
├── pnpm-lock.yaml
├── tsconfig.json
└── ui # Plugin UI
    ├── Blocks.tsx # Block popup page
    ├── Main.tsx # Main plugin page
    └── Toolbar.tsx # Toolbar page
- The
Resourcesfolder mainly stores static resources such as images, videos, and translations. You can add more as needed. - The
luafolder contains lua scripts. After plugin installation, the controller uses these scripts to control the robot arm and end tools.daemon.lua- Main process, automatically triggered after plugin installation.httpAPI.lua- HTTP module, GUI sends POST requests to the controller, which calls corresponding methods to control the robot arm and end tools.userAPI.lua- APIs for script and block programming, called based on configuration.PluginName-modbus.lua- Modbus utility for 485 channel communication between robot arm and end tools, encapsulating lock operations for reading and writing data.mqtt.lua- MQTT connection utility for controller-to-host communication.variables.lua- Constants and variable definitions.
Development & Debugging
Plan the plugin installation interface functions, organize API interfaces, and follow a frontend-backend separation model. Dobot+ accessory page development uses React for frontend and Lua for API development.
During development, run dpt commands inside the plugin project folder. Use cd to enter your plugin folder:
# Example: cd c:/users/username/testPlugin
cd <plugin_project_path>
Step 1: Main Control Interface
- Develop the main control interface in
ui/Main.tsx - Configure plugin info (name, version, description) in
configs/Main.jsonUse the following command to adjust page styles and bind events:
dpt dev
Sample output (partial):
dpt dev
Starting server...
<i> [webpack-dev-server] Project is running at:
<i> [webpack-dev-server] Loopback: http://localhost:8080/
<i> [webpack-dev-server] On Your Network (IPv4): http://192.168.111.51:8080/
<i> [webpack-dev-server] Content not from webpack is served from
...
...
webpack 5.93.0 compiled successfully in 7147 ms
Wait for compilation to finish, then click the Preview|Debug button to enter the preview page.
Step 2: Plugin-Controller Communication
The navigation bar and plugin interface communicate with the controller via HTTP. The controller locates the corresponding plugin and function by the request URL and executes it.
Example:
- UI sends request: http://192.168.5.1:22001/pluginName/testMethod
- The host locates the plugin by
pluginNameand finds the functiontestMethodinlua/httpAPI.lua. - If found, the controller executes the Lua code in
testMethod. - If the function returns a value, it is sent back to the UI via HTTP response.
Configure Graphical Programming Blocks
Step 1: Configure Blocks
Configure block programming info in configs/Blocks.json. For details, see Block Configuration.
Step 2: Block Scripts
Each block module executes Lua code. You can write your own or use provided methods.
Example:
In lua/userAPI.lua, the OnRegist method exposes functions to blocks and scripts.
function userApiModule.OnRegist()
  EcoLog(" --- OnRegist ....  --- ")
  -- 0. Export APIs
  local isErr = ExportFunction("test", userApiModule.demoMethod1) or
    ExportFunction("demo", userApiModule.demoMethod2) or
    ExportFunction("example", userApiModule.demoMethod3)
  -- 1. Error handling
  if isErr then
    EcoLog(" --- ERR to  register .... --- ", isErr)
    dobotTool.SetError(0)
  end
end
In this code:
- Exposes
demoMethod1astest - Exposes
demoMethod2asdemo - Exposes
demoMethod3asexample
In block configuration, you can use test, demo, example in the block_code field.
Configure Script Programming
Step 1: Configure Commands
Configure command parameters in configs/Scripts.json.
See Script Command Configuration for details.
Internationalization
Internationalization is divided into two parts:
Resources/i18n/client: Translations for plugin client usage, including descriptions, blocks, scripts, etc.Resources/i18n/plugin: Translations for plugin installation and control interface.
Find Resources/i18n/client and configure translations per language.
Example for Chinese and English:
-
In
Resources/i18n/client/zh.json, add underconfig:{
"config": {
"tr_description": "扩展IO插件"
}
} -
In
Resources/i18n/client/en.json, add underconfig:{
"config": {
"tr_description": "Extended IO plugin"
}
} -
In
configs/Main.json:{
"name": "EXTIO",
"version": 1,
"description": "%{tr_description}"
}
With this setup, DobotStudio Pro will display the corresponding translation based on the UI language.
Note
If using multiple languages, you must configure at least Simplified Chinese and English. English is shown by default.
Build & Use
Build Plugin
After development, debugging, and optimization, run the final build:
dpt build
After successful execution, dist and output folders will appear.
dist: Contains the built plugin code for inspection.output: Contains the compressed zip file<plugin_name>-<version>.zipfor client import.
Use Plugin
-
Navigation bar entry
-
Import plugin
If a plugin with the same name exists, uninstall it before importing.
- Select plugin zip file
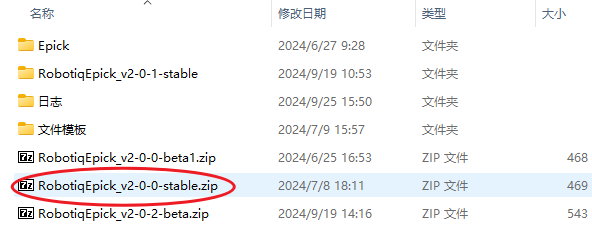
The plugin package is a zip file named
<plugin_name>_v<major>-<minor>-<patch>-<status:test,stable,rc>.zip