Adapting I/O Devices
This example shows how to use the
dobot-plusskill in an AI Agent to adapt external devices via controller I/O (DI/DO) or tool-end I/O (ToolDI/ToolDO). Instead of writing Lua, HTTP APIs, and UI pages by hand, the Skill generates plugin scaffolding from your I/O requirements inRequirements.md—you only need to prepare the document and invoke/dobot-plusin the IDE.
Example Workflow
Environment Setup
Confirm the following before development. See Development Environment for more detail.
| Dependency | Version / Notes |
|---|---|
| Node.js | v20 or later |
| IDE | Supports Agent Skills (e.g. Cursor) |
| @dobot-plus/cli | Global install; provides the dpt command |
| @dobot-plus/skill | Global install; provides the /dobot-plus skill |
Install:
npm install -g @dobot-plus/cli @dobot-plus/skill@latest
Verify:
node -v    # Should print v20.x or later
dpt -v     # Confirm CLI works
After install, the Skill is deployed to ~/.agents/skills/dobot-plus. Enable Agent Skills in your IDE settings to use it.
Writing Requirements.md (General Requirements)
The Skill does not create or modify Requirements.md. You must write a complete I/O requirements document in the project root.
Required Content
| Category | Description |
|---|---|
| Communication method | Controller DI/DO, or tool-end ToolDI/ToolDO (pick one; do not mix) |
| I/O ports | Port number and direction (input/output) for each function |
| Level semantics | What high/low level means for each port |
| Status criteria | Success/failure conditions for read functions (e.g. DI-1 high = started) |
| Function semantics | Each atomic operation exposed externally (output control / status read) |
| Operation flow | Typical start/stop/reset sequence (including wait and timeout guidance) |
Recommended Outline
- Device overview
- Communication method (controller I/O or tool-end I/O)
- I/O port details (port number, direction, level meaning)
- Function list (split into atomic operations)
- Operation flow
- Version info and safety notes
Split functions into atomic operations whenever possible—each function should do one thing. Use camelCase Verb+Noun naming, e.g. StartDevice, GetStartStatus.
I/O vs Modbus
| Item | I/O control | Modbus RTU |
|---|---|---|
| Protocol field | "protocol": "io" | "protocol": "modbus-rtu" |
| Underlying API | DI / DO / GetDO or ToolDI / ToolDO | Register read/write |
| Document focus | Port numbers and level semantics | Register addresses, bit fields, comm params |
| Generates modbus.lua | No | Yes |
Controller I/O APIs: IO commands. Tool-end I/O: Tool commands.
Generate with AI
If you have wiring diagrams, PLC interaction specs, or vendor manuals, ask a general-purpose AI model to turn the I/O definitions into Requirements.md, review it, and save it in the project root.
Sample AI prompt:
You are an industrial device I/O integration documentation assistant. From the materials I provide, produce a Requirements.md document that meets the requirements below.

## Output requirements
1. Output Markdown only from my materials; do not invent port numbers, level meanings, or timing
2. Mark uncertain items as "TBD"; do not guess
3. Keep function names in English camelCase, e.g. StartDevice, GetStopStatus

## Must include
1. Device overview
2. Communication method: controller DI/DO or tool-end ToolDI/ToolDO
3. I/O port table: port number, direction (input/output), high/low level meaning
4. Function list: one atomic operation per item, with port and expected level
5. Typical operation flow (e.g. start → wait for feedback → confirm status)
6. Version info and safety notes

## Function splitting rules
- One action per function; camelCase Verb+Noun naming
- Do not merge: StartAndStopDevice, ControlDevice, etc.
- Separate write (DO output) and read (DI input) functions
- Read functions must define return value meaning (e.g. 1=success, 0=failure)

The device model to adapt is: <device model name>
After generation, verify manually:
- Communication method (controller vs tool-end) matches actual wiring
- DI/DO port numbers match on-site wiring
- High/low level meanings match the device manual
- Functions are split into atomic operations
- Status read success/failure criteria are clear
Save the file as Requirements.md in the project root, then invoke /dobot-plus in an IDE Agent session.
Select Agent mode:
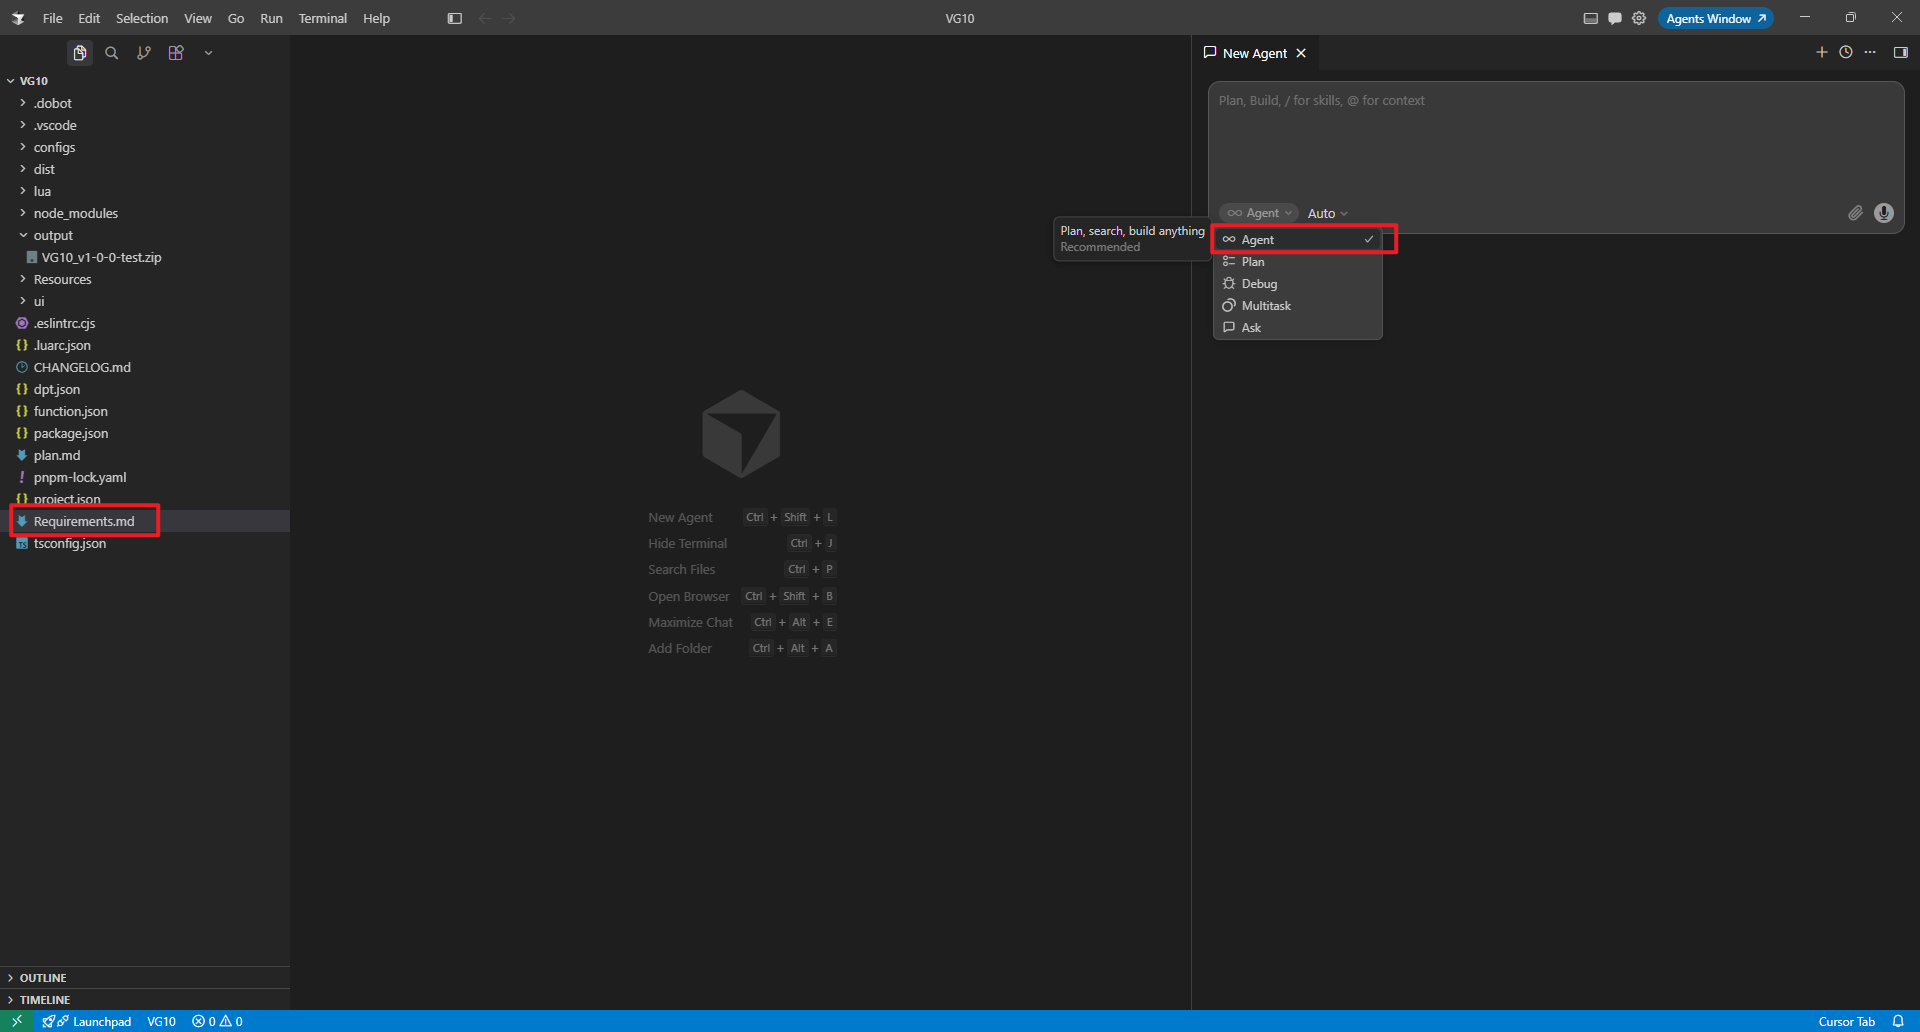
Invoke the /dobot-plus skill:

Device Examples
The examples below use controller DI/DO to interact with external devices: DO sends start/stop commands; DI reads device feedback. Run dpt create first, then write Requirements.md.
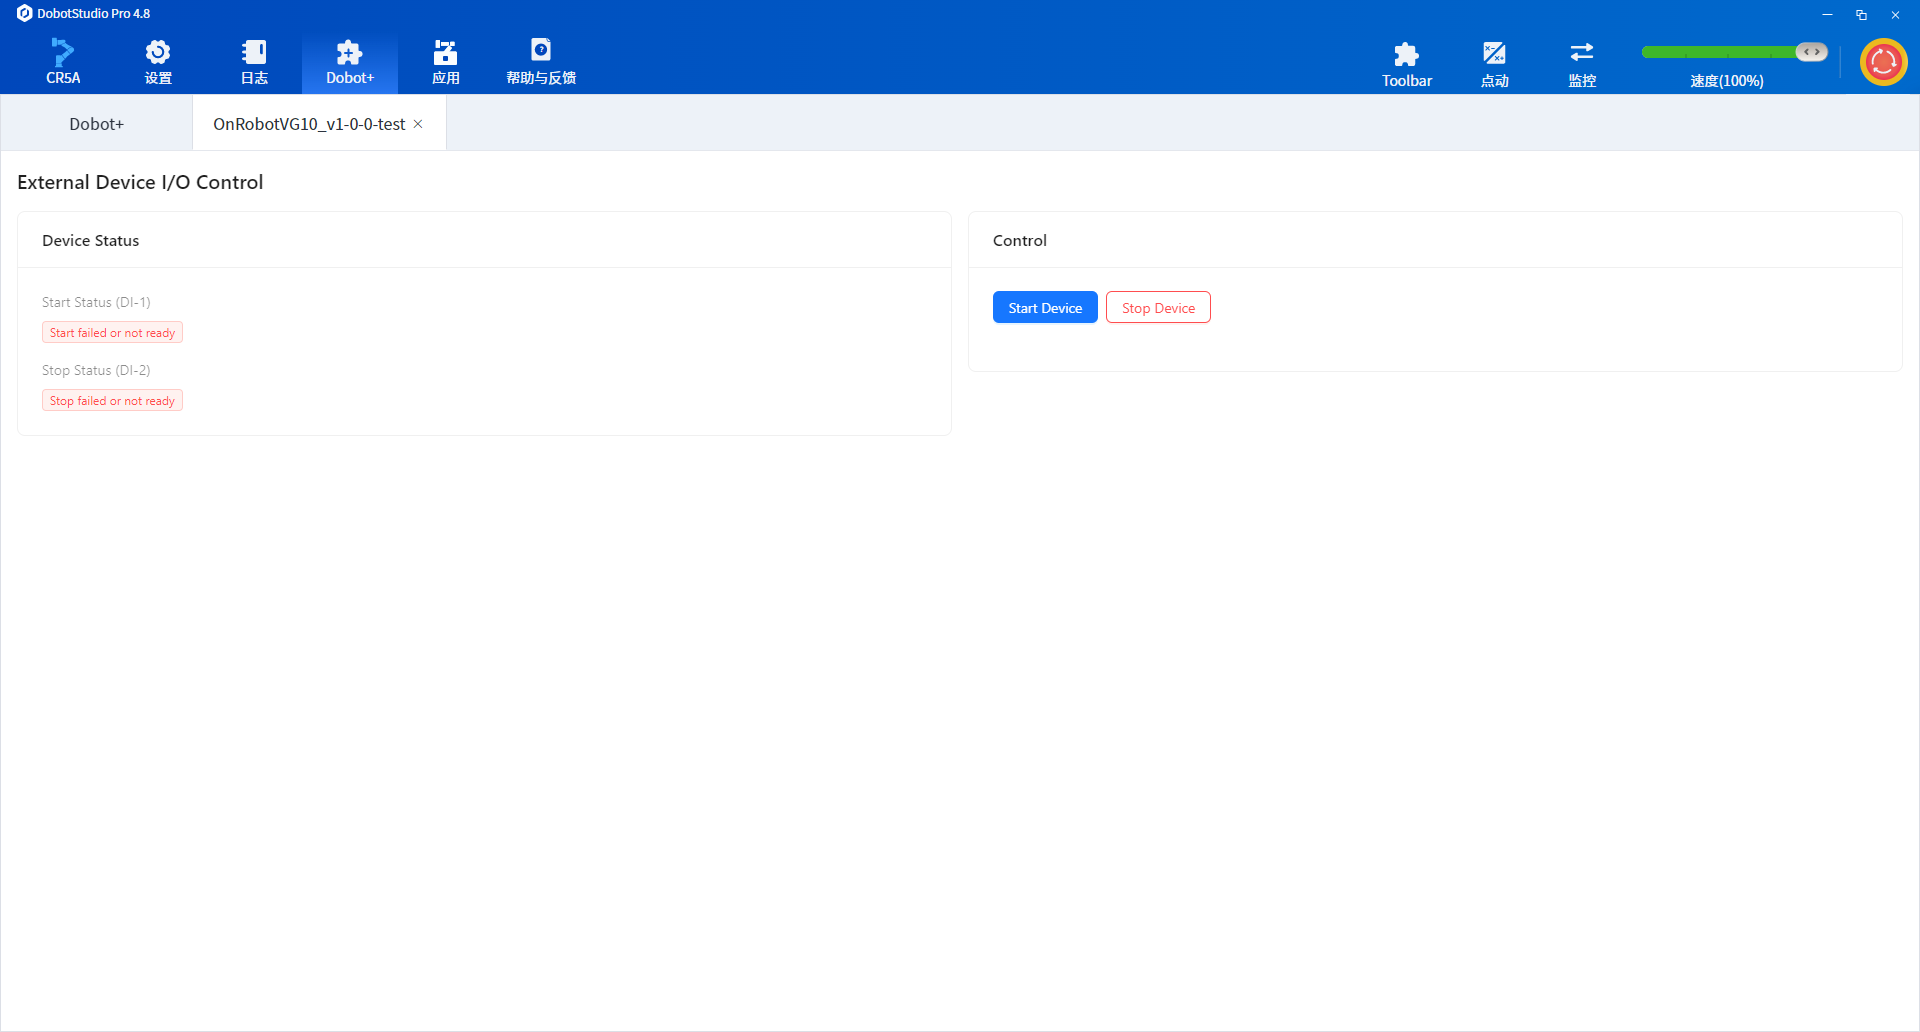
External device I/O control
Create project:
dpt create
Example prompts:
$ dpt create
? Please input plugin name: io
? Please input plugin description: A plugin demo for external device IO control
? Please input plugin version: 1-0-0-test
? Please input device IP: 192.168.5.1
Then:
cd io
Full I/O control Requirements.md example
# I/O Control Example

> Send commands to an external device via controller digital outputs (DO) and read status via digital inputs (DI).

## 1. Device overview

This plugin controls an external processing device over controller I/O—no Modbus or TCP.

## 2. Communication method

| Item         | Description                                       |
| ------------ | ------------------------------------------------- |
| Protocol     | Controller I/O                                    |
| Output ports | DO (digital output)                               |
| Input ports  | DI (digital input)                                |
| Lua API      | `DO(index, ON\|OFF)`, `DI(index)`, `GetDO(index)` |

## 3. I/O ports

| Port | Direction | High level     | Low level          |
| ---- | --------- | -------------- | ------------------ |
| DO-1 | Output    | Start command  | Idle / not started |
| DO-2 | Output    | Stop command   | Idle / not stopped |
| DI-1 | Input     | Device started | Device not started |
| DI-2 | Input     | Device stopped | Device not stopped |

## 4. Functions

### 4.1 StartDevice — start external device

- Action: `DO(1, ON)` — high level on DO-1
- UI: button

### 4.2 GetStartStatus — read start status

- Action: read `DI(1)`
- Return: `1` if DI-1 is high (started); `0` if not ready or failed
- UI: read-only status

### 4.3 StopDevice — stop external device

- Action: `DO(2, ON)` — high level on DO-2
- UI: button

### 4.4 GetStopStatus — read stop status

- Action: read `DI(2)`
- Return: `1` if DI-2 is high (stopped); `0` if not ready or failed
- UI: read-only status

## 5. Operation flow

### Start

1. Call `StartDevice` — DO-1 high
2. Wait for device response (1–3 s recommended)
3. Call `GetStartStatus` — confirm DI-1 is high

### Stop

1. Call `StopDevice` — DO-2 high
2. Wait for device response (1–3 s recommended)
3. Call `GetStopStatus` — confirm DI-2 is high

## 6. Safety notes

- Confirm DO wiring before operation to avoid unintended device triggers
- After stop command, confirm safe shutdown via DI feedback
- If DI stays low, check external device fault or wiring
After generation, verify:
- Communication method in
Requirements.mdis controller I/O (if using tool-end I/O, switch to ToolDI/ToolDO and update port descriptions) - DO/DI port numbers match on-site wiring
- Each function describes a single operation
Tool-end I/O (ToolDI / ToolDO)
If the device is wired to the robot tool end rather than the controller, set communication to tool-end I/O and use ToolDO / ToolDI in function descriptions. For manual implementation, see Basic IO example.
Using the Agent Skill
Open the plugin project and run this slash command in IDE Chat:
/dobot-plus
Import and use
- Open DobotStudio Pro → Dobot+ plugin management
- Uninstall any existing plugin with the same name
- Import the zip from
output/ - Use the plugin from the nav bar (UI, blocks, scripts)
Package name format:
<plugin-name>_v<major>-<minor>-<patch>-<status>.zip
See Quick Start — Build & Use for screenshots and details.
Example Plugin UI Screenshots
FAQ
Manual build when Agent packaging fails
When development and debugging are complete, run from the project root:
dpt build
Output:
dist/— built plugin source for inspectionoutput/— zip package<plugin-name>-<version>.zipfor import
Skill reports missing Requirements.md
Ensure Requirements.md is in the project root with I/O port definitions and functions. The Skill will not create it for you.
No DI feedback after DO output
- Verify DI/DO wiring and port numbers in
Requirements.md - Confirm external device is powered and ready
- Some devices respond slowly—add a short wait before reading DI in Lua
Mixing controller and tool-end I/O
Pick one method in Requirements.md. Controller: DI / DO. Tool-end: ToolDI / ToolDO—do not mix APIs in one function.
Poor Agent results
- Clarify port numbers and level meanings in
Requirements.md - Ensure functions are split into atomic operations (one action per function)
- Check the Agent model: use GPT-5.4 or newer in VS Code Copilot; Auto mode in Cursor generally works well